
Introduction
Protocol (SCP) stands out as a powerful component for transferring files between several machines safely. Whether you are a system administrator, or a developer, apprehending the ins and outs of the SCP command can greatly enhance your file transfer capabilities.
In this blog post, we will delve into the world of Linux SCP command and explore its features and practical usage scenarios. We will also provide you with a collection of tips and tricks to make the most out of SCP, along with real-world examples to illustrate its usage in various contexts.
What are SCP Commands in Linux?

Secure Copy Protocol (SCP) commands play a crucial role in secure and efficient file transfer between different machines. SCP, which stands for Secure Copy Protocol, is a command-line utility that permits users to securely transfer files and directories via a network. It makes use of the SSH (Secure Shell) protocol to establish a secure connection.
Unlike other file transfer protocols like FTP or SFTP, SCP offers simplicity, efficiency, and robust security features, making it a preferred choice among system administrators, developers, and Linux enthusiasts. Linux SCP command allows you to transfer files seamlessly, whether you need to manage remote systems, deploy applications, or share data with collaborators.
SCP operates on top of the SSH protocol, which provides secure communication and authentication between networked devices. When you initiate an SCP command, it establishes an SSH connection between the local host (where the command is executed) and the remote host (the destination for file transfer). This SSH connection ensures that the data transferred between the hosts is encrypted and protected from unauthorized access.
Once the SSH connection is established, SCP uses a combination of secure authentication methods and encryption algorithms to securely transfer the files. It assures that data integrity is administered throughout the transfer process, preventing any tampering or corruption.
SCP Command Syntax

To use the SCP command effectively, it is essential to understand its basic syntax. The general structure of an SCP command is as follows:
scp [options] [source] [destination]
The command begins with “scp,” followed by various options that customize the nature of the SCP command. These options allow you to control aspects such as compression, preserving file attributes, and specifying custom SSH configurations. After the options, you specify the source file or directory that you want to transfer, followed by the destination where you want to save the transferred file(s).
To make the most out of SCP syntax in Linux, here are some useful tips and tricks:
- Speeding up Transfers with Compression: SCP allows you to compress the transferred data using the “-C” option. This can significantly reduce transfer times, especially when operating with huge files or slow network connections.
- Preserving File Attributes: By default, SCP preserves the permissions and timestamps of the transferred files. However, if you want to preserve additional file attributes such as ownership and group information, you can use the “-p” flag.
- Using Custom SSH Keys: SCP leverages SSH for secure communication. If you want to use a custom SSH key for authentication, you can specify it using the “-i” option, followed by the path to your private key file.
- Specifying a Custom SSH Port: If the SSH server on the remote host is operating on a non-standard port, you are able to mention the port using the “-P” option, followed by the port number.
- Transferring Files between Remote Hosts: SCP allows you to transfer files directly between two different remote hosts without routing the data through your local machine. You can achieve this by specifying the source and destination in the format: “user1@remote1:/path/to/source user2@remote2:/path/to/destination.”

Also Read: 50+ Linux Commands with Screenshots (Download PDF)
Linux SCP Command Examples

Here are the examples that will showcase different scenarios and demonstrate the versatility and power of SCP for file transfers.
Example 1: Transferring a File to a Remote Host
Suppose you have a file named “example.txt” on your local machine, and you want to transfer it to a remote host with the IP address “192.168.0.100”. You can use the following SCP command:
scp example.txt [email protected]:/path/to/destination
In this command, replace “example.txt” with the actual name of the file you want to transfer. “user” represents the username on the remote host, and “/path/to/destination” specifies the location on the remote host where you want to save the file. Make sure to provide the correct remote host IP address and the apt credentials.
Example 2: Transferring a Directory to a Remote Host
If you own a directory with several files and subdirectories that you want to transfer to a remote host, you can employ the recursive option (“-r”) with SCP. Suppose you have a directory named “myfiles” on your local machine, and you wish to transfer it to the remote host. Use the following command:
scp -r myfiles/ [email protected]:/path/to/destination
This command will copy the entire “myfiles” directory along with its contents to the specified location on the remote host. The “-r” flag ensures that SCP performs a recursive copy, including all the files and subdirectories within the directory.
Example 3: Transferring Files with Custom SSH Key
If you want to use a custom SSH key for authentication during the SCP transfer, you can specify the private key using the “-i” option. Assuming you have a private key file named “mykey.pem”, you can use the following command:
scp -i mykey.pem file.txt [email protected]:/path/to/destination
Replace “file.txt” with the name of the file you want to transfer. The “-i” option is followed by the path to your private key file. This command will establish an SCP connection using the specified SSH key for authentication.
Example 4: Transferring Files with Compression
To speed up the transfer process, you can enable compression using the “-C” option. This is actually helpful when transferring large files or when dealing with slow network connections. Here’s an example command:
scp -C largefile.txt [email protected]:/path/to/destination
In this command, “largefile.txt” represents the name of the file you want to transfer. The “-C” option tells SCP to compress the file during the transfer, reducing the data amount to be sent via the network.
Example 5: Transferring Files between Remote Hosts
SCP allows you to transfer files directly between two remote hosts without routing the data through your local machine. Suppose you wish to transfer a file named “data.txt” from “remote1” to “remote2”. Use the following command:
scp user1@remote1:/path/to/source/file.txt user2@remote2:/path/to/destination
Replace “user1” with the username on “remote1” and
“/path/to/source/file.txt” with the actual path to the file you want to transfer. Similarly, replace “user2” with the username on “remote2”, and “/path/to/destination” with the desired location on “remote2” where you want to save the file.
Example 6: Transferring Files from a Remote Host to the Local Machine
If you are required to transfer a file from a remote host to your local machine, you can reverse the source and destination parameters in the SCP command. For instance:
scp [email protected]:/path/to/file.txt /local/path/destination
In this command, replace “user” with the username on the remote host and “/path/to/file.txt” with the location of the file you want to transfer. Similarly, “/local/path/destination” specifies the path on your local machine where you want to save the file.
Example 7: Transferring Files with Progress Bar Display
By using the “-v” option, you can enable verbose mode in SCP, which displays a progress bar during the file transfer. This is really helpful when transferring huge files to monitor the progress. Here’s an example command:
scp -v largefile.zip [email protected]:/path/to/destination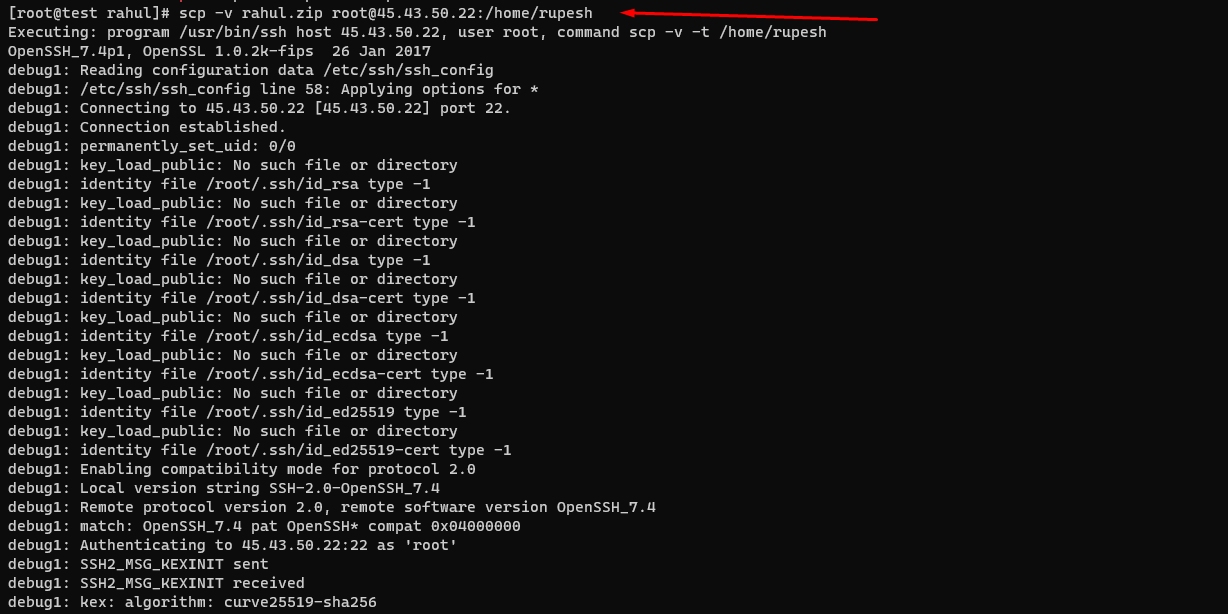
In this command, “largefile.zip” represents the name of the file you want to transfer. The “-v” option enables verbose mode, showing a detailed progress bar and transfer statistics during the process.
Example 8: Transferring Multiple Files with Wildcards
SCP supports the use of wildcards to transfer multiple files that match a specific pattern. For instance, if you want to transfer all text files from a directory, you can use the following command:
scp *.txt [email protected]:/path/to/destination
This command will transfer all files with the “.txt” extension from the existing directory to the specified location on the remote host.
Example 9: Excluding Files during Transfer
Sometimes, you are needed to eliminate particular files or directories from being transferred. SCP allows you to use the “–exclude” option followed by a pattern to specify files or directories to exclude. Here’s an example command:
scp --exclude="*.log" directory/ [email protected]:/path/to/destination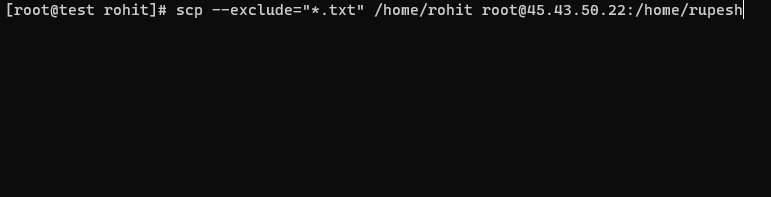
In this command, “–exclude=”*.log”” specifies that all files with the “.log” extension should be excluded from the transmission. The “directory/” represents the source directory you want to transfer, and the remaining parameters define the destination on the remote host.
Recommended: A Complete Guide to useradd Command in Linux with Examples
Conclusion
With this blog post, we explored the concept of SCP commands in Linux, understanding their purpose, benefits, and comparison to other file transfer protocols. We learned about the underlying SSH protocol, the basic syntax of SCP commands, and how to transfer files between local and remote hosts using the Linux SCP command. Additionally, we discovered some valuable tips and tricks to optimize our SCP experience.
With SCP commands at your disposal, you have a powerful tool to securely and efficiently transfer files within your Linux environment. Experiment with the different options and techniques discussed here, and unlock the full potential of SCP for seamless file transfers.
Stay connected for further insights and tutorials on Linux command-line utilities. Happy transferring with SCP!