Introduction
Are you ready to harness the full potential of your Ubuntu system by setting up a robust and efficient web server? Look no further than the LAMP stack. LAMP, an acronym for Linux, Apache, MySQL, and PHP/Python/Perl, is a resilient integration that constructs the backbone of countless websites as well as applications. In this guide, we’ll walk you through the seamless process of installing LAMP on Ubuntu, ensuring you have a solid foundation for hosting dynamic web content.
Why LAMP on Ubuntu?

Before diving into the installation process, let’s understand why LAMP is the go-to choice for many developers and system administrators. LAMP combines the stability and security of Linux, the versatility of the Apache web server, the reliability of MySQL for database management, and the dynamic scripting capabilities of PHP/Python/Perl. This stack empowers you to create and deploy dynamic, data-driven websites and applications seamlessly.
Prerequisites
Before embarking on the installation journey, ensure that you have an Ubuntu system up and running. This article is particularly tailored for Ubuntu 22.04, but the steps are generally applicable to other versions as well.
How to Install LAMP in Ubuntu
Are you ready to transform your Ubuntu system into a dynamic web server? Follow these easy steps to install the LAMP stack—Linux, Apache, MySQL, and PHP—on your Ubuntu machine. It does not matter if you are an experienced developer or just getting started, this guide will walk you through the process seamlessly.
Step 1: Install Apache
The first pillar of the LAMP stack is Apache, a powerful and widely used web server. Open a terminal and enter the following command:
sudo apt install apache2
As soon as the installation is finished, start Apache and enable it to run on system boot:
sudo systemctl start apache2sudo systemctl enable apache2
You can confirm Apache’s successful installation by opening your web browser & navigating to the IP address of your server. If each element is set up aptly, you’ll see the default Apache page.
Step 2: Install MySQL & Create a Database
Moving on to the second component, MySQL provides an efficient and strong database management system. Install MySQL by running the following command:
sudo apt install mysql-server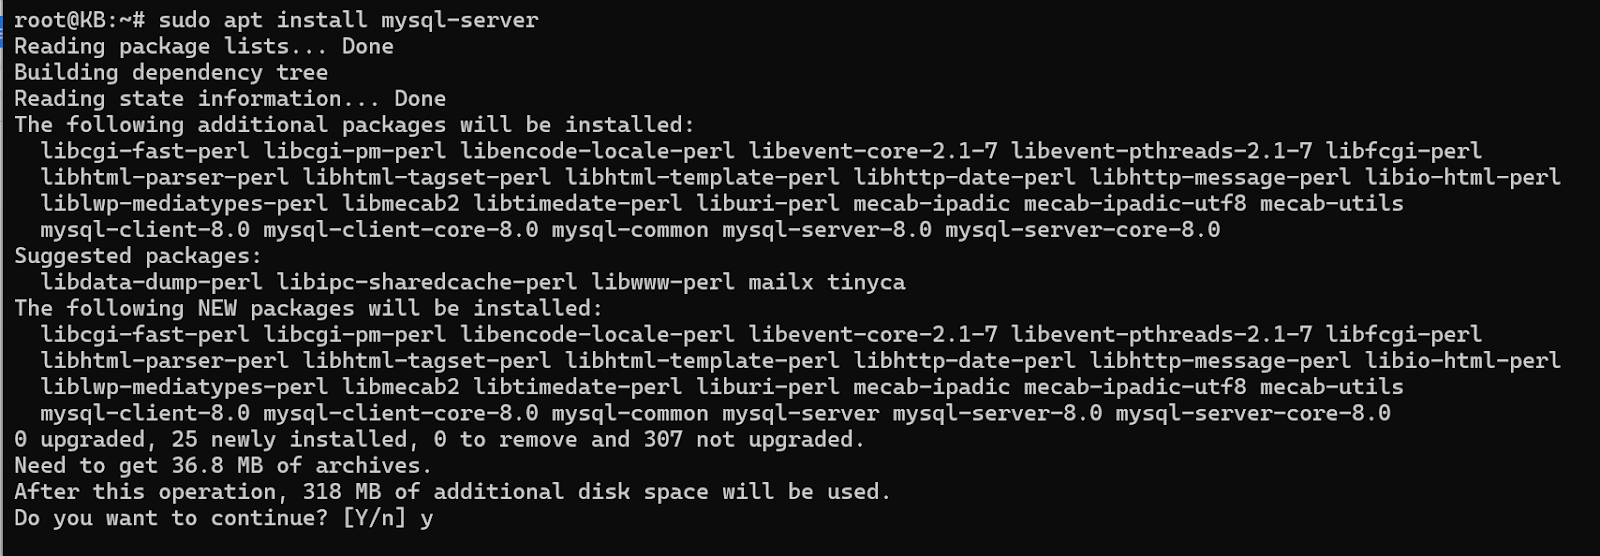
In the process of the installation, you’ll be asked to construct a root password for MySQL. After completing the installation, begin and enable the MySQL service:
sudo systemctl start mysqlsudo systemctl enable mysql
Now, construct a new database using the MySQL command-line interface. Replace ‘yourdatabase’ with your preferred database name:
mysql -u root -pCREATE DATABASE yourdatabase;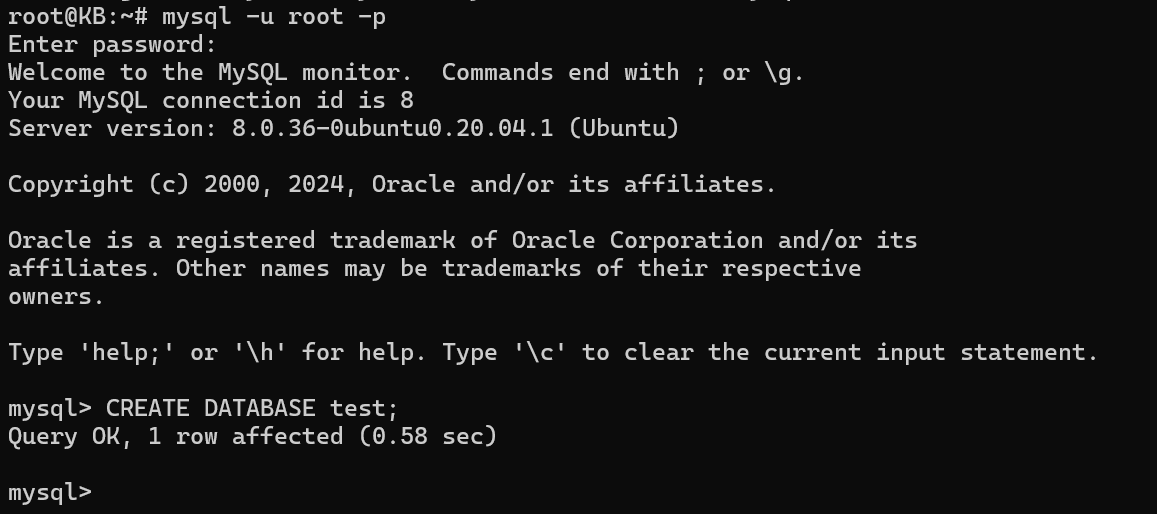
Step 3: Install PHP
The final step involves installing PHP, the dynamic scripting language that enables interaction between your web pages and the MySQL database. Install PHP and the needed modules with this command:
sudo apt install php libapache2-mod-php php-mysql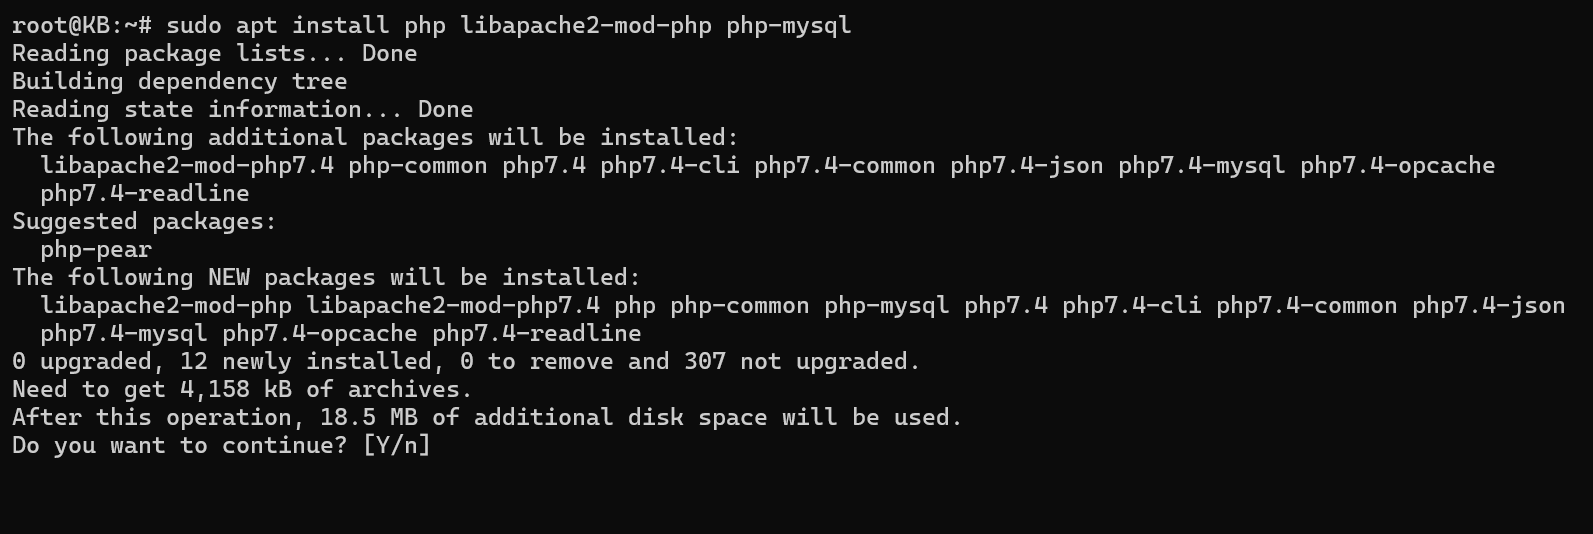
After the installation, restart Apache to apply the changes:
sudo systemctl restart apache2
Congratulations! You have effectively installed the LAMP stack on your Ubuntu system. This powerful combination is now ready to support your web development endeavors.
Feel free to explore and customize your LAMP environment further to suit your specific project requirements. Stay tuned for more detailed guides on optimizing and securing your LAMP setup. In the meantime, enjoy the capabilities of your newly configured web server!
Also Read: How to Install PIP on Mac? (Step By Step Guide)
Install PHP Modules (Optional)
Now that you’ve laid the foundation for your LAMP stack by installing Linux, Apache, MySQL, and PHP, let’s enhance the functionality of PHP by incorporating additional modules. While optional, these modules can significantly expand the capabilities of your web server and accommodate a broader range of applications.
To install PHP modules, open a terminal and use the following command:
sudo apt install php-your-chosen-module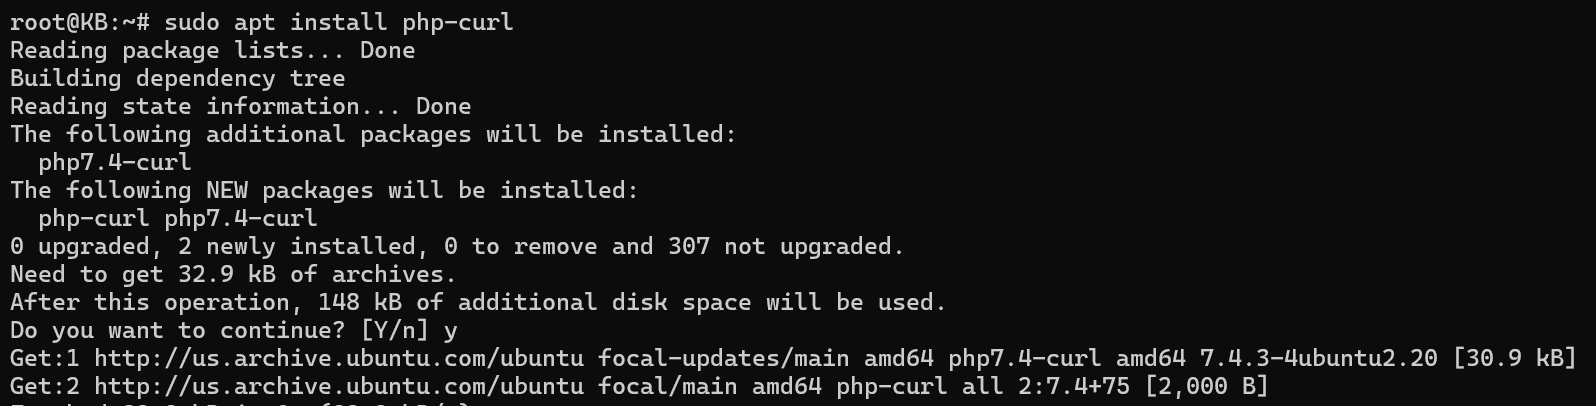
Replace “your-chosen-module” with the specific PHP module you want to install, such as php-gd for image processing or php-curl for URL handling. You can install multiple modules by separating them with spaces.
Once you’ve installed your desired modules, proceed to the next steps to ensure a seamless integration into your LAMP environment.
Step 4: Restart Apache
After installing PHP modules, it’s crucial to restart the Apache web server to apply the changes. Execute the following command:
sudo systemctl restart apache2This ensures that Apache recognizes the newly installed PHP modules and incorporates them into the web server configuration.
Step 5: Testing PHP Processing on your Web Server
Now, let’s verify that PHP is functioning correctly on your web server. Construct a simple PHP file in the default web directory. Use the following command to open a text editor:
sudo nano /var/www/html/info.php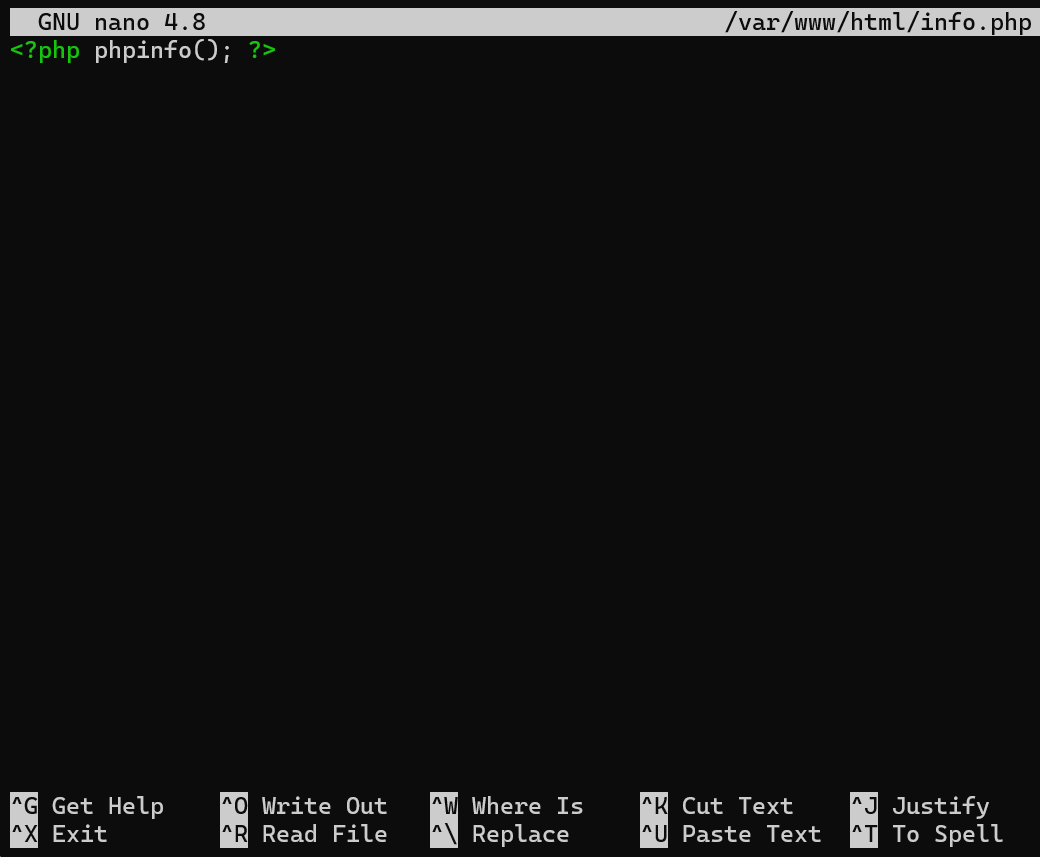
Add the following line to the file:
<?php phpinfo(); ?>
Save and close the file.
Next, open your web browser & navigate to http://your-server-ip/info.php, replacing “your-server-ip” with the actual IP address of your Ubuntu server.

If PHP is configured accurately, you should see a comprehensive page detailing PHP configuration settings. This page confirms that PHP is processing correctly within your LAMP stack.
Congratulations! You’ve successfully installed additional PHP modules, restarted Apache, and verified PHP processing on your web server. This step ensures that your LAMP environment is ready to support a diverse range of web applications and services.
Stay tuned for more advanced LAMP stack customization tips and tricks to optimize your web server for various development scenarios. Your Ubuntu system is now a versatile platform poised to handle dynamic web content with ease!
Also Read: How to SSH into a Docker Container and Run Commands?
Conclusion
Congratulations on successfully installing the LAMP stack on your Ubuntu server! By following these straightforward steps, you’ve transformed your system into a robust and versatile web server capable of handling dynamic content and applications. The LAMP stack, comprised of Linux, Apache, MySQL, and PHP, forms the backbone of countless websites worldwide, seamlessly integrating the stability of Linux, the efficiency of the Apache web server, the reliability of MySQL databases, and the dynamic scripting capabilities of PHP.
As you venture into the world of LAMP, remember that this installation lays the groundwork for a multitude of web development possibilities. Whether you’re a seasoned developer or a beginner exploring the vast landscape of web technologies, your Ubuntu server is now equipped to support a diverse range of projects. To further enhance your LAMP environment, consider exploring additional PHP modules, optimizing server configurations, and implementing security best practices. Stay tuned for upcoming articles that delve deeper into advanced LAMP customization, ensuring your server is finely tuned for production environments. Thank you for choosing this guide on “How to Install LAMP in Ubuntu.” If you have any questions or if there’s a specific aspect of LAMP you’d like us to explore further, do not stumble to reach out. Happy coding, and may your LAMP-powered projects thrive on your Ubuntu server!