
Introduction
In the globe of Linux-based operating systems, Ubuntu stands as one of the most prevalent as well as globally employed distributions. Its vital security features and easy accessibility make it a foremost option for both individual users and organizations. One crucial aspect of managing an Ubuntu system is user administration, which includes adding new users with varying levels of privileges.
In this blog post, we will explore the process to Add User as Sudoer and granting them the necessary sudo privileges or adding them to Group Sudo on Linux. The sudo (Superuser Do) command allows authorized users to execute commands with elevated privileges, enabling them to perform administrative tasks effectively. By adding a user to the sudo group or assigning specific sudo privileges, system administrators can strike a balance between security and user access.
Throughout this guide, we will provide detailed, step-by-step instructions on How to Add User as Sudoer on Linux, configure sudo privileges, and add the user to the sudo group. We will also cover best practices and considerations to ensure a secure and well-managed user environment.
Whether you are an Ubuntu user seeking to expand your knowledge or an administrator responsible for user management, this blog post will equip you with the necessary information to create new users with sudo or sudo group privileges on Ubuntu OS. By the end of this tutorial, you will have a comprehensive understanding of user administration in Ubuntu and be ready to manage user access effectively while maintaining system integrity.
Also Read: How to Install Node.js on Ubuntu: A Step-by-Step Tutorial
4 Steps to Add User to Sudoers on Ubuntu

Step 1: Creating a New User:
You need to create a new user towards the first step of adding a user as sudoer user on Ubuntu. The process involves creating a user account with a distinct username and a safe password. To create a new user, execute the below steps:
- Open a terminal on the system running “Ubuntu”. For this, either press Ctrl+Alt+T or search for “Terminal” in the application menu.

- Utilize the adduser command followed by the preferred username for constructing a new user account. For example, run the command sudo adduser newuser. Replace “newuser” with the desired username for the new user.

- You will be pinged to enter and verify a secure password for the new user. Assure to pick a powerful password that fulfills the system’s password complex necessities. The password is not visible on the screen when you begin to enter.
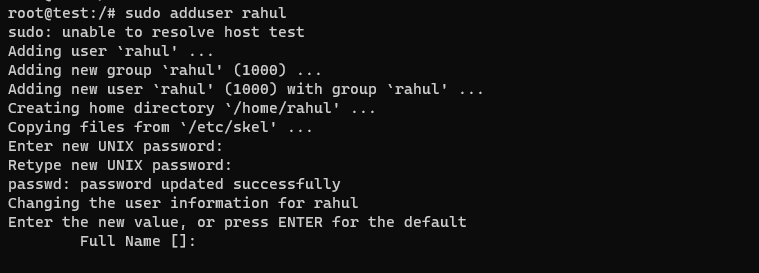
- Provide any extra details prompted by the command, like the complete name of the user, address, telephone number, etc. This information is optional and can be avoided by pressing Enter.
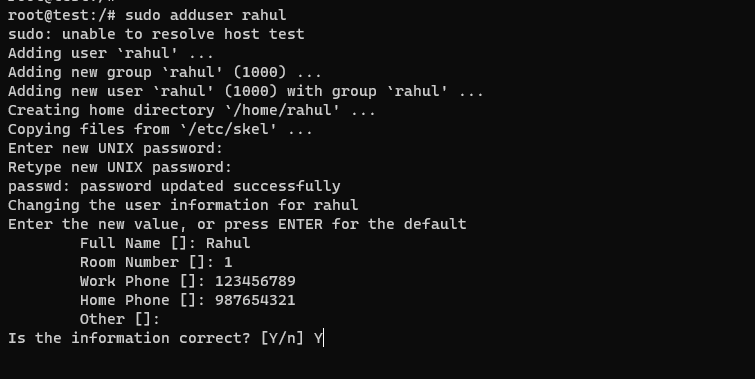
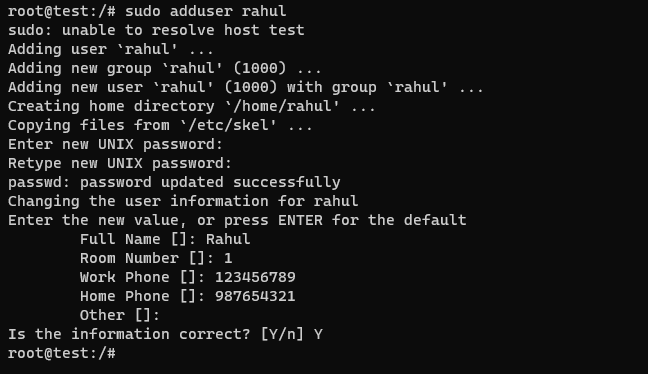
- Review the information provided for the new user. If everything is correct, press Enter to create the new user account. The system will create the necessary files and directories for the user.
Step 2: Granting Sudo Privileges:
After creating the new user account, the next step is to grant sudo privileges, which allow the user to execute administrative commands. To grant sudo privileges, follow these steps:
- Open a terminal on your Ubuntu system.

- Run the command sudo visudo to open the sudoers file in the system’s default text editor. This file controls the sudo access on the system.
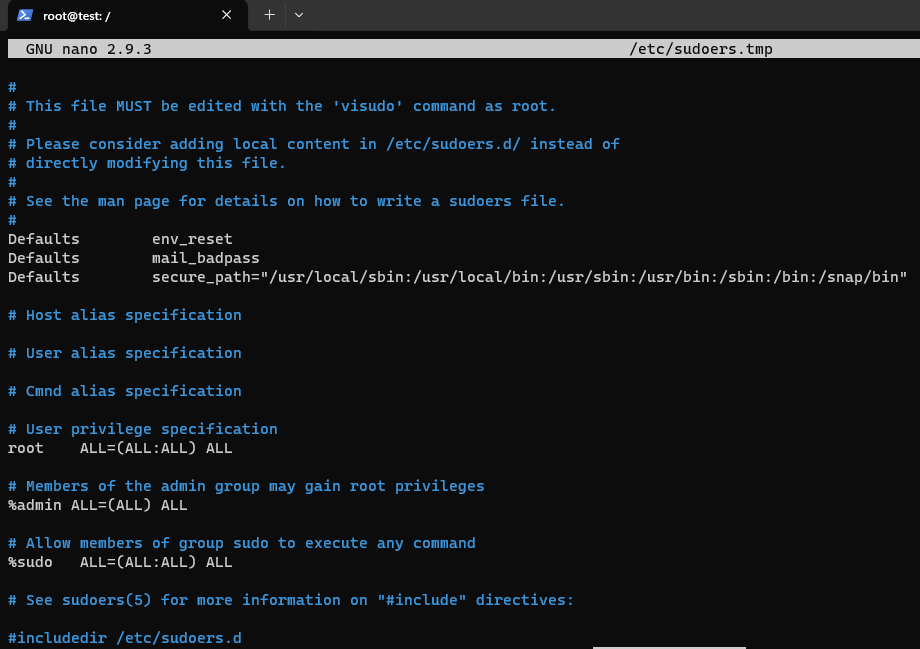
- In the sudoers file, locate the line that starts with %sudo or %admin. This line tends to provide sudo privileges to the users in the sudo or admin group, respectively.
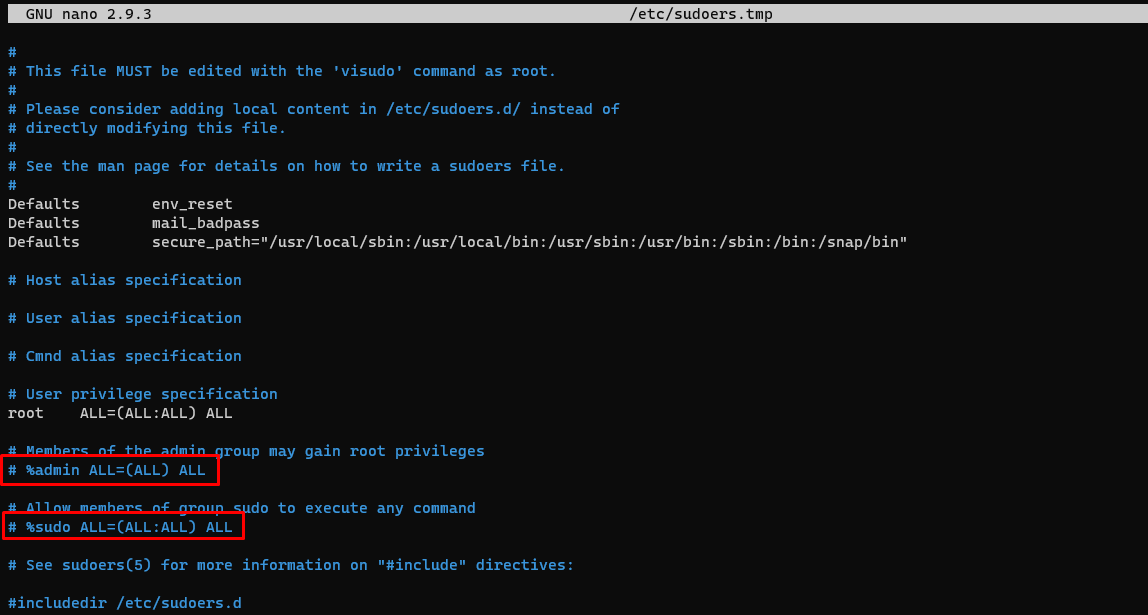
- Uncomment the %sudo or %admin line by eliminating the ‘#’ symbol at the front of the line. This enables sudo access for users in the corresponding group.
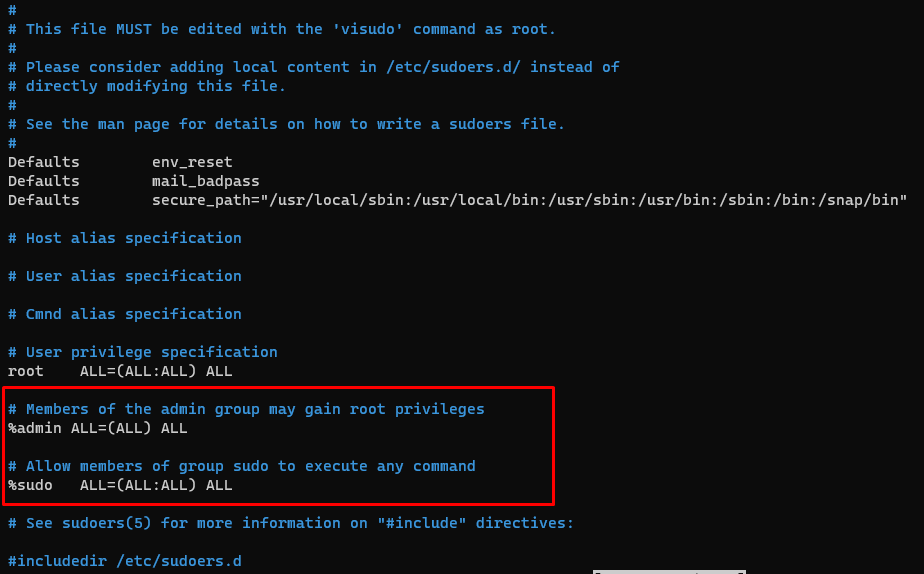
- Save the modifications and exit the sudoers file. In the nano editor, you can press Ctrl+O to save the file and Ctrl+X to exit.
Step 3: Adding User to the Sudo Group:
An alternative method to grant sudo privileges is by appending the user to the sudo group. The sudo group is created during the Ubuntu installation and grants sudo access to its members. To add the user to the sudo group, follow these steps:
Open a terminal on your Ubuntu system.
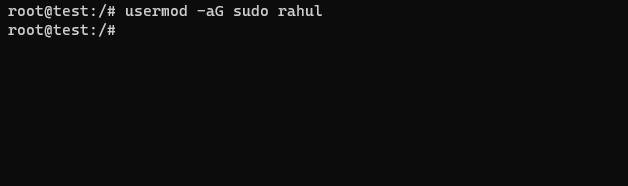
Run the command sudo usermod -aG sudo newuser, where “newuser” is the username of the user you wish to append to the sudo group. This command exactly appends the user to the sudo group.
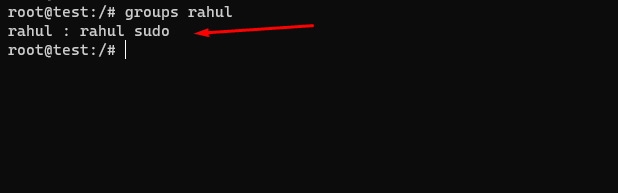
Assure that the user has been appended to the sudo group with the help of the command group newuser. This command displays the groups that the user is connected to, and the output should include the “sudo” group.
Log out and log back in with the newly created user account for the modifications to take effect. The user will now have sudo privileges.
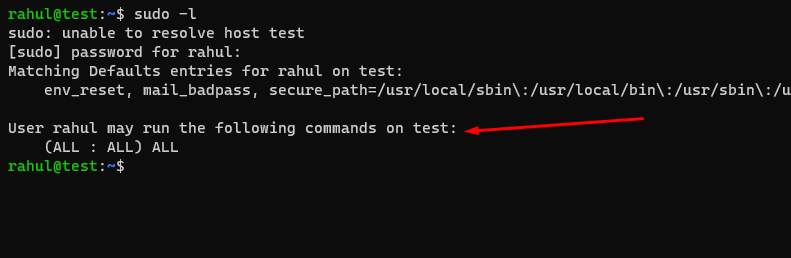
Step 4: Verifying Sudo Access:
After granting sudo privileges to the user, it is important to verify that the user can execute administrative commands using sudo. To verify sudo access, follow these steps:
- Open a terminal on your Ubuntu system.

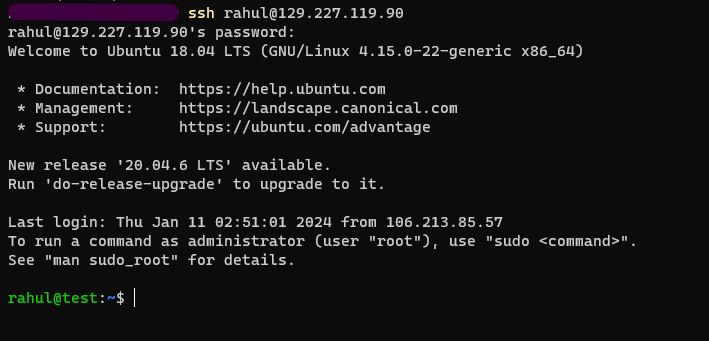
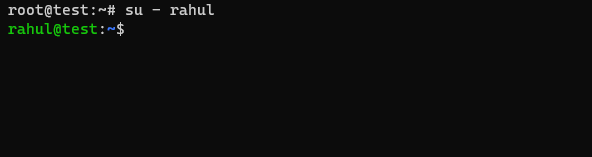
- Switch to the newly created user account by running the command su – newuser, where “newuser” is the username of the user you created. This command allows you to temporarily switch to the new user account.
- Execute a command with sudo, such as sudo apt update. This command updates the package lists on your system and requires administrative privileges.

- You will be pinged to enter the password for the new user. Give the password and press Enter. Note that the password is not shown when you begin to type.
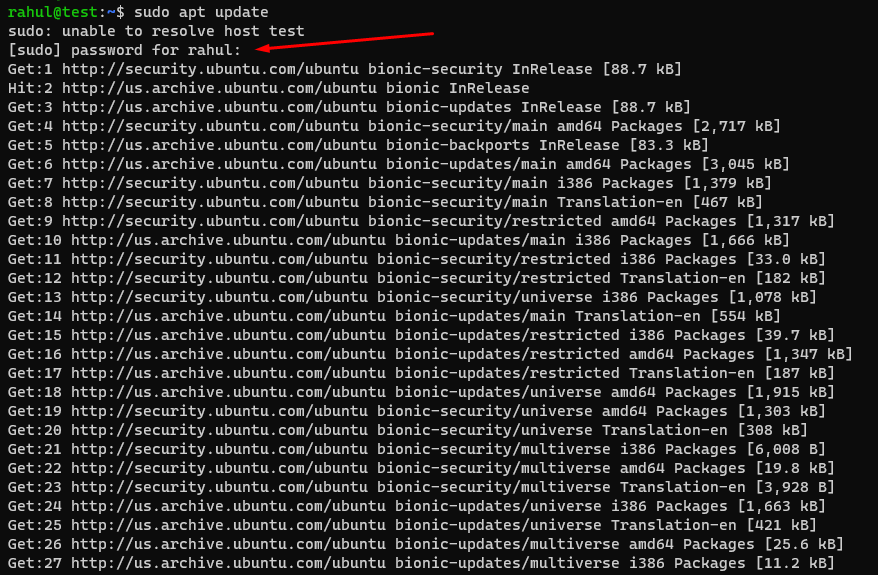
- In case the command is implemented successfully without any complications, it indicates that the user has sudo access. You can also verify by running other administrative commands or using sudo -l to list the user’s sudo privileges.
By following these four steps, you can successfully add a new user with sudo or sudo group privileges on your Ubuntu system. This enables the user to execute administrative tasks while maintaining the principle of least privilege, improving the security and manageability of your Ubuntu environment.
Also Read: How To Create New MySQL User and Grant Privileges?
Conclusion
Mastering the process of adding user as sudoer or sudo group privileges on Ubuntu OS is a fundamental skill for effective user administration and system security. Throughout this blog post, we have explored the step-by-step instructions to add a sudo user in Ubuntu, configure their sudo privileges, and add them to the sudo group.
By following the provided guidelines, Ubuntu users and system administrators can ensure a well-managed user environment with the right balance between user access and system security. Granting sudo privileges or adding users to the sudo group empowers them to perform administrative tasks while maintaining the principle of least privilege. It is essential to keep in mind a few best practices while creating new users and managing their privileges. Routinely review and update user access, removing unnecessary privileges to minimize potential security risks. Implement strong password policies and consider utilizing key-based authentication for increased security. Furthermore, documentation and clear user naming conventions are crucial for maintaining an organized user environment. Documenting the purpose and access levels of each user helps streamline user management and simplifies audits or access reviews.
By following these practices and leveraging the power of the sudo or sudo group, Ubuntu users can ensure a secure and efficient system administration process. With the insights acquired from this guide, you are now equipped to confidently create new users and manage their privileges on Ubuntu OS. This will further contribute to a well-structured and secure Ubuntu environment.