


Introduction
For the development of Java-based applications, Maven serves as a build as well as a dependency management tool. It is set up using Windows environment variables, similar to many Java-based development tools, instead of getting deployed as a Windows service. A consistent development environment for different teams is produced using a POM (Project Object Model) methodology.
We’ll demonstrate how to install Maven on Windows based PC in the following article.
System Requirements
This is what the system needs:
- Windows-based devices.
- an active Internet connection.
- entry to a user account with administrative rights.
- using the command prompt.
- a working Java installation featuring the JAVA_HOME system variable configured.
Installing Maven on Windows requires the procedures listed below.
Download Maven and Extract it from Zip File

1. Go to the Maven download website and locate the installation of Maven on Windows version you want to use. The most recent version’s archives are located in the Files section. Previous versions can be accessed by clicking the archives link under Past Releases.
2. To obtain the binary zip archive that contains the newest installed Maven version, select the relevant link. This tutorial’s current release is 3.8.4 at this point of publishing.


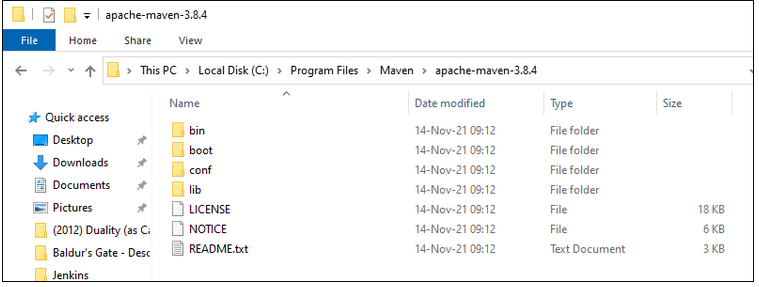
3. Following the successful download of the Maven archive, extract it to a directory of your choice because it includes no installation procedure. For the sake of this article, we are employing C:\Program Files\Maven\apache-maven-3.8.4.

Add MAVEN_HOME and JAVA_HOME System Variable

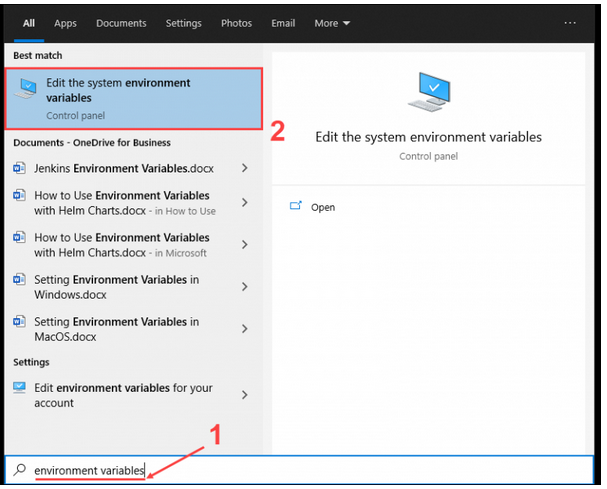
1. Click on Start, then type “environment variables” into the search bar.
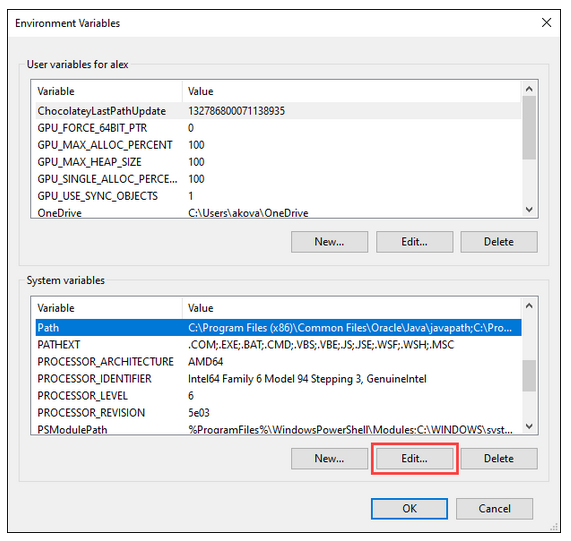
2. Select the system’s environment variables results and choose Edit.

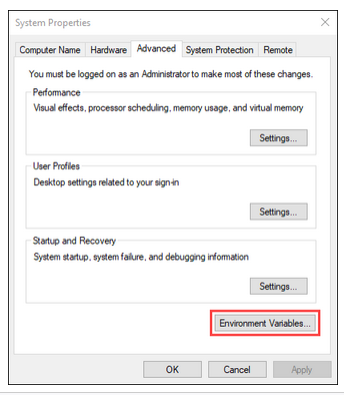
3. Select Environment Variables from the list of options on the Advanced tab within the System Properties window.

4. To add a brand-new system environment variable, choose the New button beneath the System Variables section.

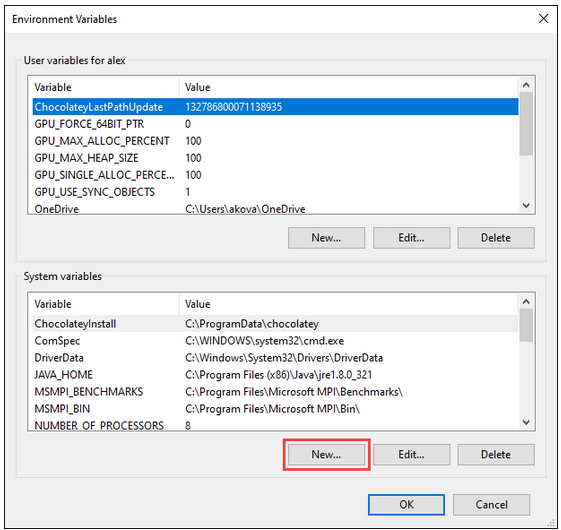
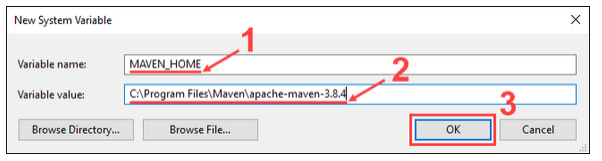
5. Type MAVEN_HOME as a variable name as well as the Maven directory path for the variable value. To save the newly created system variable, select OK.

Also Read: 70+ Windows CMD Commands List with Screenshots (Download PDF)
Add MAVEN_HOME Path in the Environment Variable

1. From the Environment Variables window’s system parameters section, choose the Path variable. The variable can be changed by clicking the Edit button.

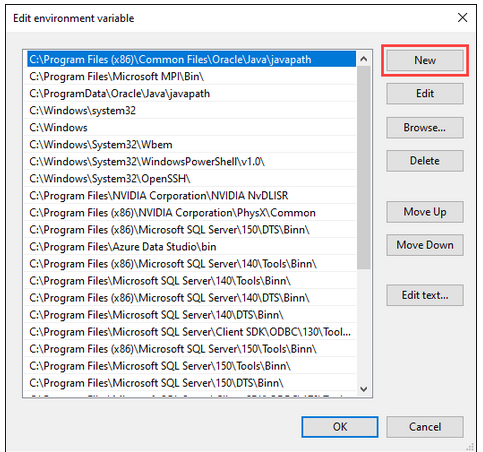
2. Within the editing environment variable window, choose New.

3. Put in %MAVEN_HOME%\bin within the newly created field. To save adjustments to the Path variable, select OK.

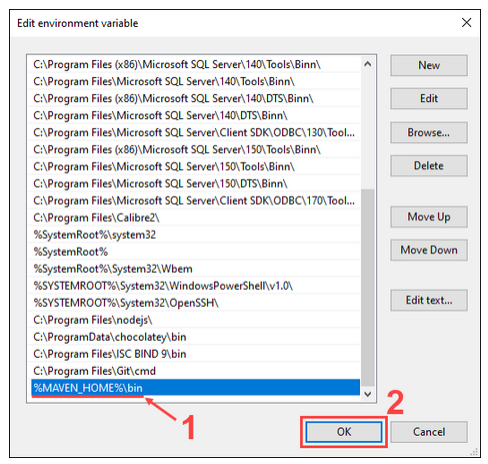
Not providing the path for the Maven home directories to the Path variable results in ‘mvn’ not getting recognized as an external or internal command, operable program, and batch file error while executing the mvn command.
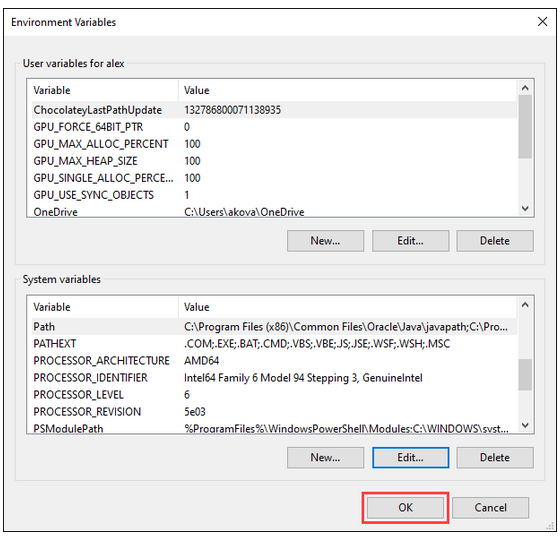
4. Press OK within the Environment Variables box to save the system variable modifications.

Verify Maven Installation
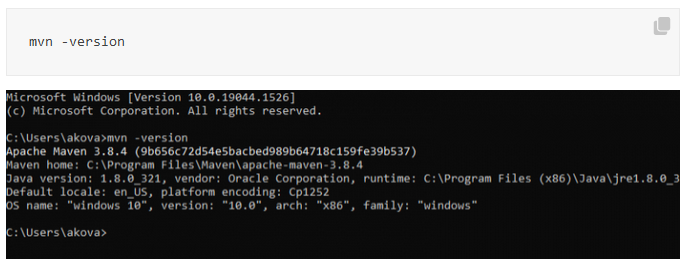
To confirm the installation by examining the most recent installation of Maven version, enter this command from the command prompt:
mvn -version
Also Read: How to Install Pip on Windows?
Conclusion
An all-inclusive and user-friendly method of creating Java applications is offered by the build-automation tool Apache Maven.
Once you’ve finished reviewing this article, you will find out how to install Maven on Windows should get downloaded and prepared for use on your Windows computer.